Welcome!

"Welcome! Thank you for joining my blog. I will be taking you to the farms, to the market, into my kitchen and into my life as the market manager!" ~Kiersten

Sunday, August 19, 2012

Spaghetti Squash...


Have you tried it? I hadn't ever tried spaghetti squash until a couple weeks ago. Boy have I been missing out! It is delicious and can be prepared so many ways. Check out a few of the recipes that I have used with spaghetti squash. 

Spaghetti Squash

1 squash
olive oil

Cut your squash lengthwise in half. Place face down on a lightly greased baking sheet. Cook in the oven at 350 for 45 minutes (time may vary depending on your oven). Allow squash to cool. Shread squash using a fork, place the spaghetti in a bowl and use immediately or refrigerate for later use. 

Buttery Spaghetti Squash
Take your squash and toss with olive oil or melted butter. Add salt and pepper to taste and then top with parmesan cheese! Quick, easy and delicious! 

Spaghetti Squash Hashbrowns

Heat your skillet and a little oil. Then put in the spaghetti squash. Allow to brown on the first side then turn and brown on the other side. YUM! I haven't tried it but I bet you could add a little egg to the squash in the bowl and then form into hash brown pattys for that variety. 

Spaghetti Squash Spaghetti

Top squash with your favorite red sauce for a low carb substitute for pasta! 

Spaghetti Squash Side Dish

2 cups shredded spaghetti squash 
1 egg
1/2 cup crushed crackers
1/2 cup finely chopped onion
1/2 cup shredded cheese (your favorite variety)

Combine all ingredients in a bowl. Heat skillet with a little oil and butter in it. Pour in mixture and allow to brown on each side. 


Monday, July 16, 2012

Soap at the Market...

PureTouch Essentials Soap

You can find more than delicious produce, meats, fruits, and cheeses at the market. My family also enjoys staying clean with homemade soaps from PureTouch Essentials Soap. Jennifer Hill and her husband Jason bring amazing soaps to the market that they make in their home. Their soap is made using a Natural Cold Process. They also feature essential oils that benefit your skin. I am going to let you stop by and visit with Jennifer to get all of the details on the process and the specific oils she uses and I am going to skip right to telling you how much we love her soap.

I have three types of her soap in my bathtub that I rotate using just because I couldn't pick just one! My son and daughter have been using PureTouch Essentials Soap since they started coming to market and have their different scents all lined up for use. PureTouch Essentials Soap leaves your skin feeling soft and smooth. It has a great lather for your whole body! Yes it is great to clean your hands, but don't forget to take it over to the bath or shower to use there too! Or better yet just come up and get a second bar for the bath or shower!

Come up to the market tomorrow and pick up your favorite scent!

Basic
Lemongrass & Tea Tree
Milk & Honey
Patchouli
Tea Tree
Cherry Blossom
Oatmeal & Tea Tree
Karma
Black Amber & Lavender


The basic is $3.00 and all the others with Essential Oils are $4.00

Friday, July 6, 2012

Turkey in July....I think so!

Yes it is over 100 degrees outside and far from the cool weather of November, but Laura from Country Neighbors Farm had an extra turkey taking up room in her freezer and asked if I wanted one. I thought that sounded great so last week I brought home a 14 pound turkey from the market! 

Now that I had the turkey I had two problems: 
1. I have never cooked a turkey before...
2. It is over 100 degrees outside and I don't want to turn on the oven...

I started thawing the turkey when I came home from market Tuesday night and it was thawed and ready to cook Thursday. I solved both of my problems by treating the turkey like a chicken. I brined the turkey overnight with water, kosher salt, lemon juice and a little brown sugar. The next morning I rinsed the turkey and then rubbed it with olive oil and a little salt. coated the inside with about a 1/4 cup of honey. Then I fired up my grill (one side only) and put on the turkey breast down. Let it be for about one hour and then turned the turkey and glazed it with honey. After another hour I turned it again and glazed with honey. It took about 2.5 hours until it was completely done. Make sure you let it rest and cool off before you cut it up to enjoy. 

So when it is 100 degrees you can cook a turkey without heating up your house and it is delicious! So order an extra one from Laura...one for Thanksgiving and one for the summer! I believe she is taking orders for those holiday birds now!!!! 

Sides to go with Grilled Turkey in the summer: 

Fried Corn off the Cob 
Caleb came home from work the other day and said one of his co-workers was talking about fried corn and so we tried it. I would say it is a success and a great way to use up any extra ears of corn that are already cooked. 

3 slices of bacon
5-6 ears of corn with the corn cut off ( I used corn from the Kircher Farm...they will be back a market in a couple weeks)

Fry the bacon and leave the grease
Add the corn and cook until it has a crunch but is not crispy 

I added a some diced up patty pan squash from the market and cooked it right with the corn. I also crumbled the bacon and put it back in at the end. 

This was a wonderful side dish! 


Deviled Eggs
Hard boil eggs from Blue Bell Farm and cool 
Remove shells, slice in half and remove yolks
Mix the yolks with salt, pepper, mayo and a little mustard
Put the yolk mixture back into whites and serve


Monday, June 25, 2012

Honey Recipes

After my experience extracting honey I had to come home and cook with it, too! We enjoy honey by the teaspoon straight from the bottle, but these are some great ways to enjoy honey in a meal!

Grilled Whole Chicken with Honey 
1 chicken from Country Neighbors Farm
1 jar of honey from Potterosa (you will not need the whole jar)
1 apple
olive oil, salt and pepper

I used a gas grill (if using charcoal you will have to have a cool spot for the chicken). My grill has a double burner so I turned on the burner to the right on med and the one on the left was off. Prepare your chicken by rubbing it with olive oil, salt and pepper to taste. Then I cut up an apple and stuffed it inside the bird along with a generous squirt of honey. Place chicken on the part of the grill that is not on and leave it alone for 40 minutes. After 40 minutes, turn the chicken and glaze with honey. Wait another 30 minutes and turn again and glaze with honey. Check the chicken at this point to see how close to done it is with a meat thermometer. At 180 degrees it is done.

Take your chicken off the grill and let it sit for 5-10 minutes before cutting. Add your favorite side dishes and you have a great meal!


Honey BBQ Chicken

Take your left over chicken from above and warm back up in a skillet with 1/2 cup BBQ sauce and about 1/4 cup honey. I served this with baked potatoes and sauteed zucchini and broccoli from the market!


Sunday, June 24, 2012

My first lesson in honey extraction = success

Dennis and Bonnie Potter are the owners of Potterosa Honey and we have been talking all season about me going out to visit the bees. Just so everyone knows up front the idea of getting that close to bees was not something I was really looking forward to, but curiosity won this internal battle! This weekend was extraction weekend at Potterosa Honey and I was lucky enough to be part of all of it! I say extraction weekend because this was a two day farm visit for me so I could see the whole process!

That's me ready to start extracting!
Yes, I said lucky...what a difference a visit with the bees makes!

DAY 1: Friday afternoon I met Dennis at one of his many hives to extract honey. He had an extra suit for me and so I got to suit up (it is warm in those suits but if the choice is bee stings or a little sweat I am going with sweat every time). You can see two hives in the picture and then there was another starter hive called a NUC just out of the picture. The taller hive is where we extracted honey. 
The bees need a little smoke to stay calm.
Those bees are gently brushed
off the frame! 
My first frame of honey. It is full! 
We got all suited up and Dennis got a little fire going in his bee smoker box and then added some green grasses to get a cool smoke. Put a little smoke near their entrance and over the bees that are on top of the box when you remove the lid and they completely ignore you. Why...well the bees use pheromones to signal danger which causes them to attack because they are protective of their hive. The smoke masks those pheromones so there is no signal of danger and we are safe while extracting the honey. Once you take the top off the hive it is time to get to work, but I learned around bees you move at a leisurely pace because then you don't startle them or disrupt their work because they are always working. Each frame is pulled out and examined. If the honey is capped by the bees like in the pictures it is ready to be extracted. The bees cap the honey when it has just a little over 18% water in it. This honey will last forever if you let the bees do their work and patiently wait for them to cap it. We extracted 10 frames from this hive and replace them with new frames so the bees can keep doing what they do! It is amazing to watch them work and I am so thankful I didn't chicken out of this farm visit!

Watching the experts! 
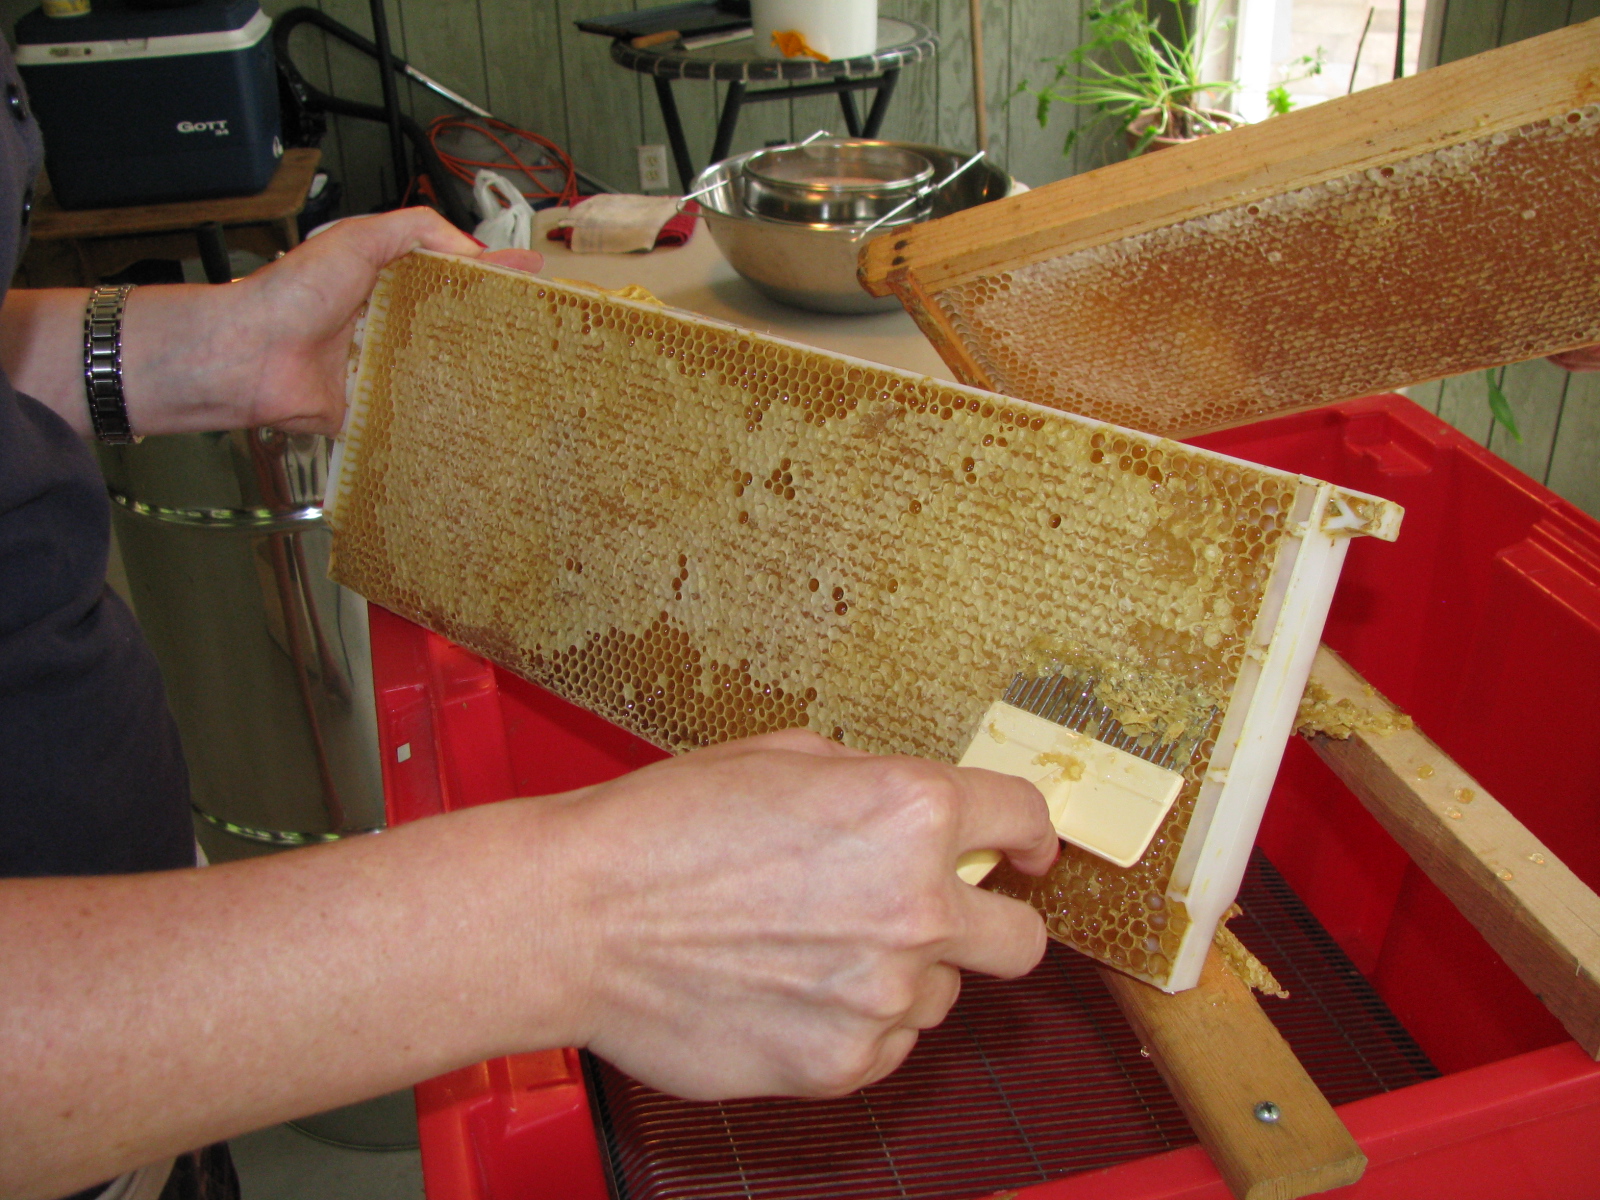
This is the tool for uncapping.
Uncapping the honey!  
DAY 2: I got to visit the home of Dennis and Bonnie Potter for day two of honey extraction! It was a beautiful day on Saturday to be in a screened in porch extracting honey. Extraction day is an event around the Potter home. Clayton Lee, a fellow Beekeeper brought his 16 frames for extraction, too! We dive right in and I say "we" because they let me be a part of the whole process. First you have to uncap the honey. You take the tool pictured and just gentle remove the caps....after a little practice like 10 frames or so I had a pretty good rhythm! After uncapping the frames you put them four at a time into the extractor and spin by hand until all the honey is flung out of the frames. The honey then flows down through the first strainer. The honey is then sent through two more strainers before ending in a bucket. The honey will stay in the bucket for a couple days until all the bubbles have come to the top and then it is bottled and ready for sale!
It is like being a kid again getting to
spin the honey out of the frames! 
Grandpa's little helpers!
The "honey fairy" working her magic! 
Liquid gold....gorgeous honey! 
As we were getting started Dennis and Bonnie's family arrived and it became a family event! Their son and daughter with their spouses and the grandkids joined in all the fun. It was so special to see the grandkids watch in awe of the whole process and get right in there to help. I was a little in awe of the experience myself. The kids and spouses didn't hesitate to take turns either. Extracting honey is a very fun process and man the results on fresh muffins is delicious! We had to bottle a jar immediately for everyone to enjoy on Bonnie's fresh muffins and biscuits! YUM!
In control of the honey flow!

1st jar...it was so good!
I feel like I got a crash course in bees, beekeeping and extracting
honey in two days! Dennis said that it is contagious and I know what he meant now. I have been pondering bees on our land since I left their house on Saturday.

Thank you to Dennis, Bonnie, and the entire family for sharing your very fun day with me. Thank you to Clayton Lee for letting me have a go at uncapping your honey!


Potterosa Honey will be back at the market on Tuesday with the freshest honey you can get....well unless you go help on extraction day!


Sunday, June 17, 2012

Eggs...yes please!


Farm fresh organic eggs are delicious. They are richer and have a more vibrant color than the eggs you can buy in the grocery store. You can find eggs at the market from many vendors depending on the day and their egg production. There are brown eggs and "Easter Eggs". My kids love to eat the "Easter Eggs" because they like to pick out their egg color before we eat! 

Eggs are a staple in our lives and we often just think of them as a breakfast food or an ingredient in a dish. Yes...eggs are great for breakfast and they are essential in lots of dishes. Here are a few ways that we enjoy eggs.

Recently I had an abundance of eggs from Blue Bell Farm so one evening I boiled a dozen eggs. When I boil eggs I bring the water to a boil and then boil the eggs for 8-10 minutes. So you have a dozen hard boiled eggs...now what? Here is what I did with those eggs.


  • I enjoyed hard boiled eggs for breakfast with some three seed bread from Nitty Gritty Dirt Farm.
  • Another way to enjoy hard boiled eggs for breakfast is to make a white sauce with butter, flour and milk and thicken. Then chop up some of the eggs in the sauce. Top your favorite toast with this egg gravy.....it is delicious!!!!
  • I made egg salad: cut up your hard boiled eggs, add a little mayo (it doesn't take much with these eggs), salt, pepper, and dry mustard. Combine and enjoy as a sandwich or with crackers. I did both....a sandwich for dinner and then egg salad with crackers while at work for lunch the next day. 
  • A hard boiled egg makes an excellent snack, too! 
  • You could also make a wilted salad with fresh spinach from the market, slice hard boiled eggs, bacon, and onion. You make a hot vinaigrette and drizzle the salad. Yum! 
These are just a few ways to enjoy eggs! They are so much more than just a staple food so pick up some farm fresh eggs and get to cooking! 

Saturday, June 9, 2012

Cooking experiments.....

Trying new things has never scared me in the kitchen. They key to that confidence is that you have to be ok if something you try goes wrong because it does sometimes. I thought I would start off this blog with sharing one experiment that did not work out and then a few that did work out delicious! 

When I got pie cherries a couple weeeks ago at the market I was very excited to make my first ever cherry jam. Yum! So I sat and pitted all the cherries. I had to share a few with my dog who loved them, but boy did he drool! :) I found a recipe online and got to work. All of the jam recipes are essentially the same  when they are made without pectin, which I didn't have on hand. This particular recipe said to cook at a simmer for 30-40 minutes. I did it for 30 minutes because it was at the right temperature. Excitedly poured it into the jar and sealed it up. When I heard my top "pop" a little later I was thinking I had just successfully made my first cherry jam. I woke up the next morning, made toast, opened up my newly made jam and it was as hard as a rock. Taste good, but there is no spreading this stuff! It happens. I got some more pie cherries from Sandy Creek Farm this past week so I will be trying this again! 

Ok, now some recipes that went great on the first go! 

Brisket in the oven..yes please! 
  • 1 Brisket from Nitty Gritty Dirt Farm
  • Olive oil
  • Homemade rub (1/4 cup Kosher salt, 1 tbsp garlic salt, 1 tsp pepper, 1tsp dry mustard, and 1/4 cup bbq spice..you need enough to cover your brisket so the amounts will vary a little)
  • Time
  • bbq sauce if you want
You have to plan a little in advance for this meal, which you probably all have figured out by now that I don't do very often! Thaw your brisket at least a day in advance of when you want to cook it and then the night before mix up your rub. Coat your brisket in olive oil and then get your hands dirty and put on the rub. Cover and place in your fridge to let those spices get to work! The next morning wrap your brisket in 4 layers of foil and place in a shallow pan to catch in juices. Put it in your oven on the lowest temp (175-200). Go to work or ignore it for the day. I put mine in at around 8ish and then took it out at 5ish. I opened it all up on the top and poured on a little bbq sauce and put it back in the oven for 30 minutes. Take it out and slice it up! Delicious! 

Homemade coleslaw for 2

You can get a cabbage in a lot of varieties and from a variety of vendors right now at the market. I love cabbage raw or cooked, but last night I made homemade coleslaw. 

1 head of cabbage (mine came from Elmtree Farm this time)
1 large carrot (shredded or sliced)

Dressing (You may have dressing left over, but I just stuck mine in the fridge to use another day)
1/8 cup apple cider vinegar
1/3 cup sugar
2 tbsp mayo
salt and pepper to taste

Mix up your dressing and let it hang out in the fridge while you chop up the cabbage and carrot. I thinly sliced the cabbage and sliced the carrot. Top with your dressing (to your taste) and then let it hang out in the fridge again until you are ready to eat. YUM!

We made sandwiches out of the brisket and enjoyed the coleslaw on the side last night for dinner! It was worth the extra planning! The bonus is there is enough brisket left over for at least two more meals!  What a great way to stretch your dollars....a meal for less than $5.00 for two!!!!